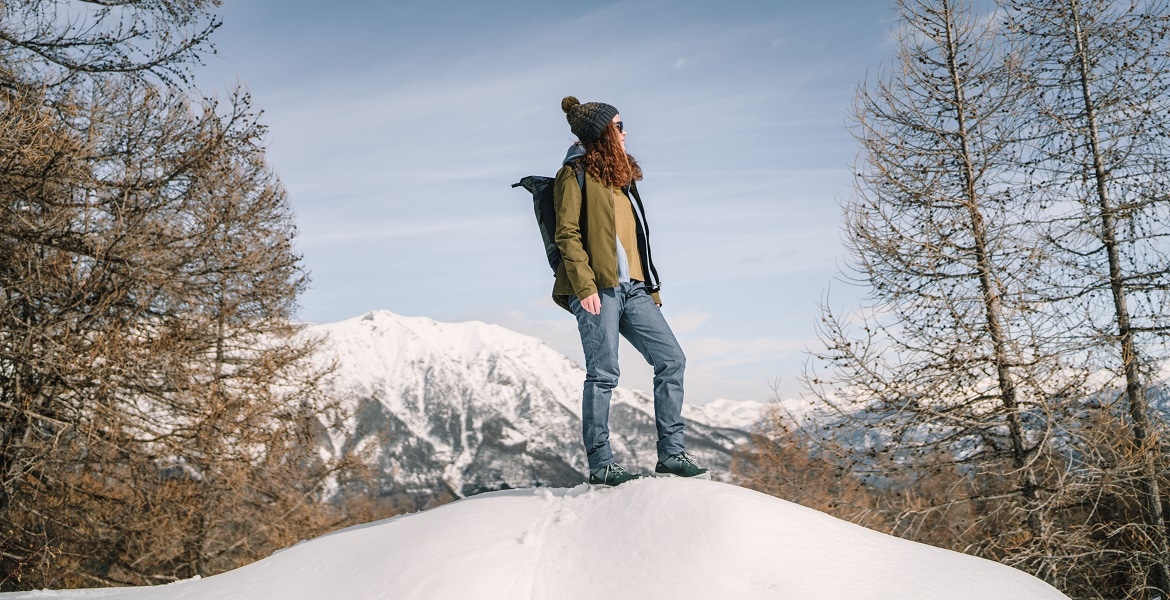
Packing for a winter hike looks different from when you’re embarking on a summertime adventure – there’s less light, it’s colder, and you’ll likely contend with slippery trails. While those may sound like reasons to hang up the hiking boots for the season, with a little bit of preparation you can hike during the winter comfortable and confidently.
We worked with Pacific Crest Trail thru-hiker and winter hiking enthusiast, Kathleen Neves to share some tips on what kind of gear to pack for cold weather hikes.
Stay Hydrated and Keep Your Water From Freezing
During warm weather hiking, you can use a hydration reservoir or bladder to carry your water on the trail, but with winter hiking, the cold temperatures can easily freeze the water in the reservoir and the tube, making drinking water from the tube impossible. To avoid this, we recommend using an insulated reservoir so that you don’t run into a frozen tube; or you can always use water bottles. Read more tips on how to stay hydrated while hiking.
PRO TIP: Store your water bottle upside down in your pack. This way if the water freezes, it freezes from the bottom, making the water at the top of the bottle still drinkable.
Additionally, if you have the space, consider also packing a thermos filled with hot chocolate or coffee to warm yourself up from the inside out during breaks. Remember though, the longer you stop for a break, the quicker your body will get cold and the harder it will be to warm back up.

Stay on Your Feet with Traction Devices
Depending on conditions, it’s always helpful to carry microspikes. These lightweight traction devices fit over your hiking boots to provide extra grip when it feels like you’re slipping around on the trails. Microspikes dig into hard packed snow and ice where your boots might struggle to maintain grip. If you’re on the other end of the spectrum and dealing with deep, fresh snow, snowshoes will allow you to float on top. What happens though if you won’t need your snowshoes until you reach a certain point of the trail where the snow becomes impassable? Lash them to your pack.
How to Attach Snowshoes To Your Pack
- Front Carry - Start by putting your snowshoes together, crampons facing inwards towards each other. You can use a thick rubber band to keep the snowshoes together. If your pack has a large front panel pocket, place the snowshoes inside with the bottom of the snowshoes facing down. Pros for storing your snowshoes this way: it’s fast, easy and simple. The snowshoes stay secure and there’s no extra gear needed. Cons for storing your snowshoes this way: Depending on the height of your snowshoes, they may poke you in the head and could tear any meshy material if you’re not careful.
- Top Carry – If your pack has a top lid, use the strap to secure snowshoes in place, threading them through the snowshoes. Once snowshoes are in place and the strap has been cinched down, close the brain on top of the snowshoes and cinch down both straps of the brain. Pros for storing your snowshoes this way: it’s fast, easy and simple. The snowshoes stay secure and there’s no extra gear needed. Cons for storing your snowshoes this way: They can slide out if not securely fastened.
Visual learner? Watch Kathleen’s video on how to secure your snowshoes to your backpack
Find a Layering System
Weather can change rapidly in the mountains, especially during the winter. The goal for hiking during the winter months is to always stay as dry as possible by preventing yourself from getting sweaty. When starting a hike, be bold and start cold. That means not wearing all of your layers to start with BUT have enough layers with you to add or remove clothing throughout your hike so you can stay warm and comfortable without overheating and getting sweaty. Because getting sweaty means getting cold, which can lead to hypothermia if you’re not properly regulating your body temperature. A good layering system comes in four parts:
Base Layer
A base layer is the layer of clothing you’ll wear closest to your skin. Try to keep this layer lightweight, moisture wicking, breathable and something that dries sweat quickly. Choose something made of synthetic material or a lightweight to mid-weight wool.
Explore Base layers for Men | Explore Base layers for Women
Mid Layer
A mid layer provides insulation between your base layer and outer layer. Your mid layer should be warm enough to keep your body warm and still breathable to hike in. Materials for a mid layer could be synthetic or fleece. Just no cotton. Cotton is rotten. Once cotton gets wet, like getting covered in sweat, it will take a long time to dry.
You might even find a vest to be a great mid layer option. It keeps your core warm and toasty while allowing your arms to have more mobility and fresh air.
Explore Mid Layers for Men | Explore Mid Layers for Women
Insulating Layers
Your insulation layer can be a thicker, insulated jacket like a down puffy. This layer can be used on its own when you need a little extra insulation when stopping for a snack break or if you need more warmth on your body underneath your outer layer, when coming down the mountain when heading back towards the trailhead.
Explore Insulation Layers for Men | Explore Insulation Layers for Women
Outer Layer
Last, but not least, your Outer Layer is a shell that helps keep the wind, rain and snow out. This should be a waterproof layer like a rain jacket. To determine whether your jacket can handle a hurricane or a steady drizzle, look at the water resistant rating. A rating of up to 10K is enough to handle light to average rain for a short amount of time. Ratings between 10K and 15K can handle a moderate amount of rain for much longer, and jackets rated between 15K and 20K or higher are serious shells for heavy, intense rain over a prolonged period. You can also opt for a material like GORE-TEX to stay dry in the wettest of conditions.
Explore Shells and GORE-TEX for Men | Explore Shells and GORE-TEX for Women
Keep Exposed Skin Covered
When hiking in the winter, not only is it important to have a solid winter clothing layering system, but it’s also important to cover your skin to shield it from the elements. Here are some other layer must-haves for winter hiking:
- Beanie or hat to keep your head and ears warm
- Neck gaiter to cover your face – these even come in fleece options for extra warmth
- Liner gloves to warm up hands quickly. Consider bringing an extra pair in the event that your liners get wet OR bring a waterproof pair
- Thick mittens
- Sunglasses to protect your eyes from the wind or reflections off the snow
Put it all in a Pack
You might prefer a slightly larger pack for winter hiking because you’ll be carrying more gear during the colder months - more clothing layers, extra gear and snowshoes. Look for lots of easily accessible pockets to store gloves and snacks, as well as attachment points to secure things like water bottles or snowshoes. When you’re organizing your pack remember to stash your snacks somewhere where they won’t freeze - it’s not fun biting into a frozen energy bar!
Get Ready to Go!
Winter has a way of transforming the trails; don’t feel like you can only enjoy them the other three seasons. Once you’re prepared with the right gear and attitude, your possibilities for beautiful winter hikes are endless.
Winter hiking checklist:
- Garbage bag
- Rain cover
- Poop kit
- Microspikes
- Water bottle
- Travel thermos
- Repair/Toiletry/Tool Kit, which contains things like an emergency blanket, water filtration system, 2 zip ties for emergency snowshoe repair, multiple packets of hand warmers, a pocketknife, lighter, headlamp, toothbrush toothpaste and lip balm.
- First aid kit, which contains things like pain reliever, a tick key, a blister repair kit, various bandage sizes, a roll of leukotape, Body Glide, disposable cleansing clothes, hand sanitizer and an ankle brace
- Lightweight sit pad
- Extra pairs of socks
- Fleece neck gaiter
- Gore-Tex gaiters
- Thick mittens
- Glove liners
- Pair of rain pants
- Baselayer
- Midlayer
- Rain jacket
- A lightweight puffy jacket
- Snacks
- Sunglasses
For more ideas on what to pack, watch Kathleen’s video on her favorite winter hiking gear
Kathleen “Token” Neves, also know on YouTube as "The Hungry Hiker" is a current Salomon ambassador who’s passionate about hiking, backpacking and spending time in the Great Outdoors. Her goal is to help others get inspired to go outside and plan their next adventure – whether it’s going on a day hike, overnight backpacking trip or thru-hiking a long distance trail for several months.


